September 23, 2026
9 min read
How to Schedule a LinkedIn Post Without Missing Timing
Learn how to schedule a LinkedIn post natively and with tools, plus best times, crossposting tips, and how to avoid common scheduling mistakes.
You hit publish after lunch, then realize your audience is active in another time zone and the post lands when they're offline. That's the detail many overlook when they ask how to schedule a LinkedIn post. The button click is easy, but the key win is building a system that keeps cadence steady, lines up with working hours, and doesn't force you to scramble every day.
Table of Contents
- Why Scheduling Beats Posting in Real Time
- How to Schedule a LinkedIn Post Using Native Tools
- Native Scheduling vs Third Party Tools for LinkedIn
- Best Times to Schedule LinkedIn Posts for Engagement
- Building a Repeatable Scheduling and Crossposting Workflow
- Your Scheduling Checklist and Next Steps
Why Scheduling Beats Posting in Real Time
A lot of LinkedIn posting fails for a simple reason, the person writing the post is also the person trying to remember the right time to share it. That breaks down fast during launches, travel, client calls, or weeks when content is the first thing to slide. Scheduling fixes that by separating creation from distribution, which protects your consistency even when your day gets chaotic.
For consultants, creators, and internal teams, that separation matters more than it sounds. You can draft when ideas are fresh, then queue posts for the moments when your audience is most likely to see them. LinkedIn's scheduler made that shift inside the product itself, so the platform stopped being only a real-time feed and became a place where a content calendar can live natively LinkedIn's scheduling help.
Practical rule: don't treat scheduling as a convenience feature. Treat it as your publishing system.
That's also why this topic has two lanes. Native LinkedIn scheduling is fast and simple, while third-party tools make more sense when you're juggling multiple brands, crossposting, repurposing, or approval workflows. If you want a deeper creator-oriented breakdown, LinkedIn content scheduling for founders is a useful companion read.
The outcome you want is predictable publishing, stronger timing, and less pressure to create on demand. Once that's in place, you stop guessing and start operating like a person with a real calendar.
How to Schedule a LinkedIn Post Using Native Tools
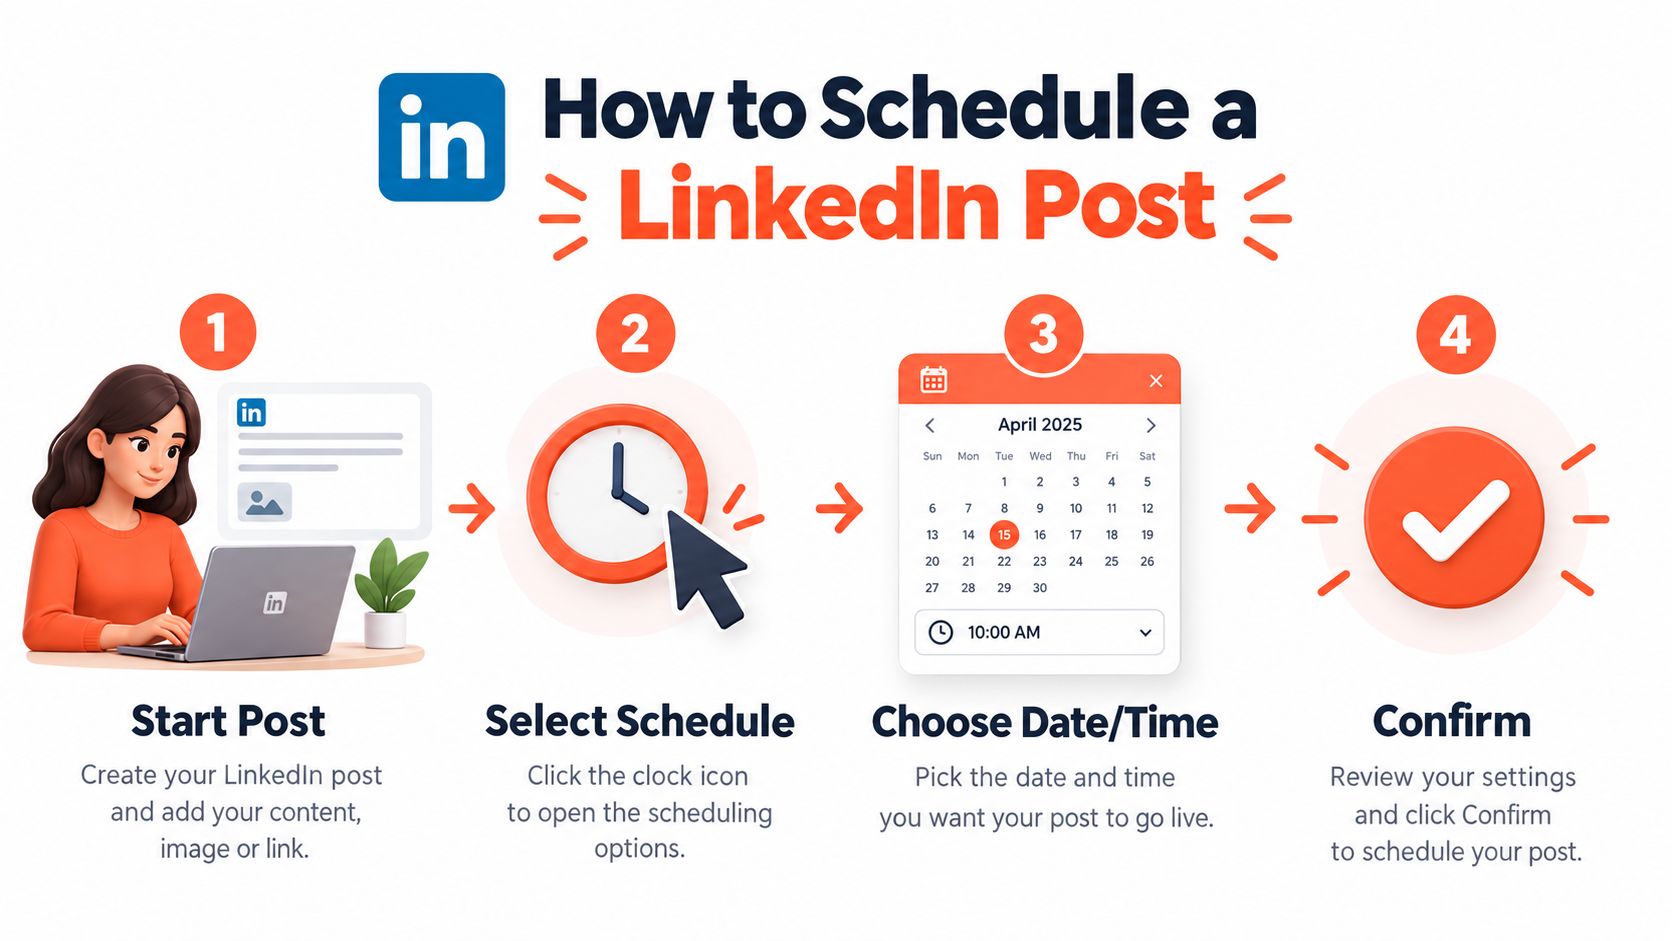
Native scheduling is the simplest place to start because it lives inside LinkedIn. Draft the post on desktop or mobile, open the clock icon, choose a date and time, then confirm the schedule. The same help page also shows a Scheduled posts view, which is where you review queued content before it goes live LinkedIn scheduling help.
The workflow that actually works
Write the post first. Add media if you need it, then stop before publishing and select the clock icon. Pick a future slot that fits LinkedIn's allowed window, which is 10 minutes to 3 months from the current moment LinkedIn scheduling help.
Two details matter in real operations. LinkedIn says page scheduling works from a Page posts or admin view, and the scheduled time follows the user's location, so time zone handling sits on you LinkedIn page scheduling help. That becomes a real issue if you manage multiple brands, work across regions, or hand drafts between teammates.
You can also enter an exact time instead of relying only on dropdown increments, which helps when a launch needs tighter timing LinkedIn page scheduling help. The Scheduled posts screen then becomes the place to edit or delete posts before they ship.
What to check before you confirm
- Check the account type: personal profiles and Pages do not behave the same way, and Page scheduling depends on admin access.
- Match the time zone: schedule for the audience's local time, not your own.
- Review the queue: a post in the wrong slot still hurts timing.
- Keep the window in mind: LinkedIn will not let you schedule indefinitely far ahead, so plan your calendar around that limit.
If you want a second perspective on native setup, LinkedIn content scheduling for founders is a useful companion read.
Native Scheduling vs Third Party Tools for LinkedIn
Native scheduling works well for a narrow workflow. If you post only on LinkedIn, keep a simple queue, and do not need design layers or multi-account coordination, the built-in option stays the cleanest choice because it keeps everything inside the platform.
Third-party schedulers make more sense once the process expands. Longer planning windows, bulk queuing, crossposting to other networks, brand kits, visual editing, RSS-based autopilot, and approval handoffs all push teams toward a separate tool. For agencies and content teams, those operational pieces usually save more time than the posting button itself.
Judge schedulers on five operational criteria: queue length, time-zone control, crossposting, brand consistency, and approval workflow.
| Feature | Native LinkedIn Scheduler | Third-Party Scheduler |
|---|---|---|
| Ease of use | Very simple, already inside LinkedIn | More setup, but more control |
| Scheduling horizon | Limited by LinkedIn's native window | Often built for longer queues |
| Time zone handling | Based on user location | Often easier to centralize across brands |
| Crossposting | Not built for it | Designed for multiple platforms |
| Brand consistency | Basic post creation | Brand kits and visual editing |
| Workflow scale | Best for one account or light use | Better for agencies and multi-brand teams |
LinkedIn's own help also makes one operational limit clear, page scheduling runs from a Page posts or admin view, and the scheduled time follows the user's location LinkedIn page scheduling help. That works fine until the process includes more people, more approvals, or more accounts.
For a broader tool comparison, the roundup at WaveGen.ai's social media scheduling tools guide is a useful reference for where a dedicated scheduler fits. Solo creators can stay native longer. Agencies and multi-brand managers usually outgrow it once coordination becomes the bottleneck.
Best Times to Schedule LinkedIn Posts for Engagement
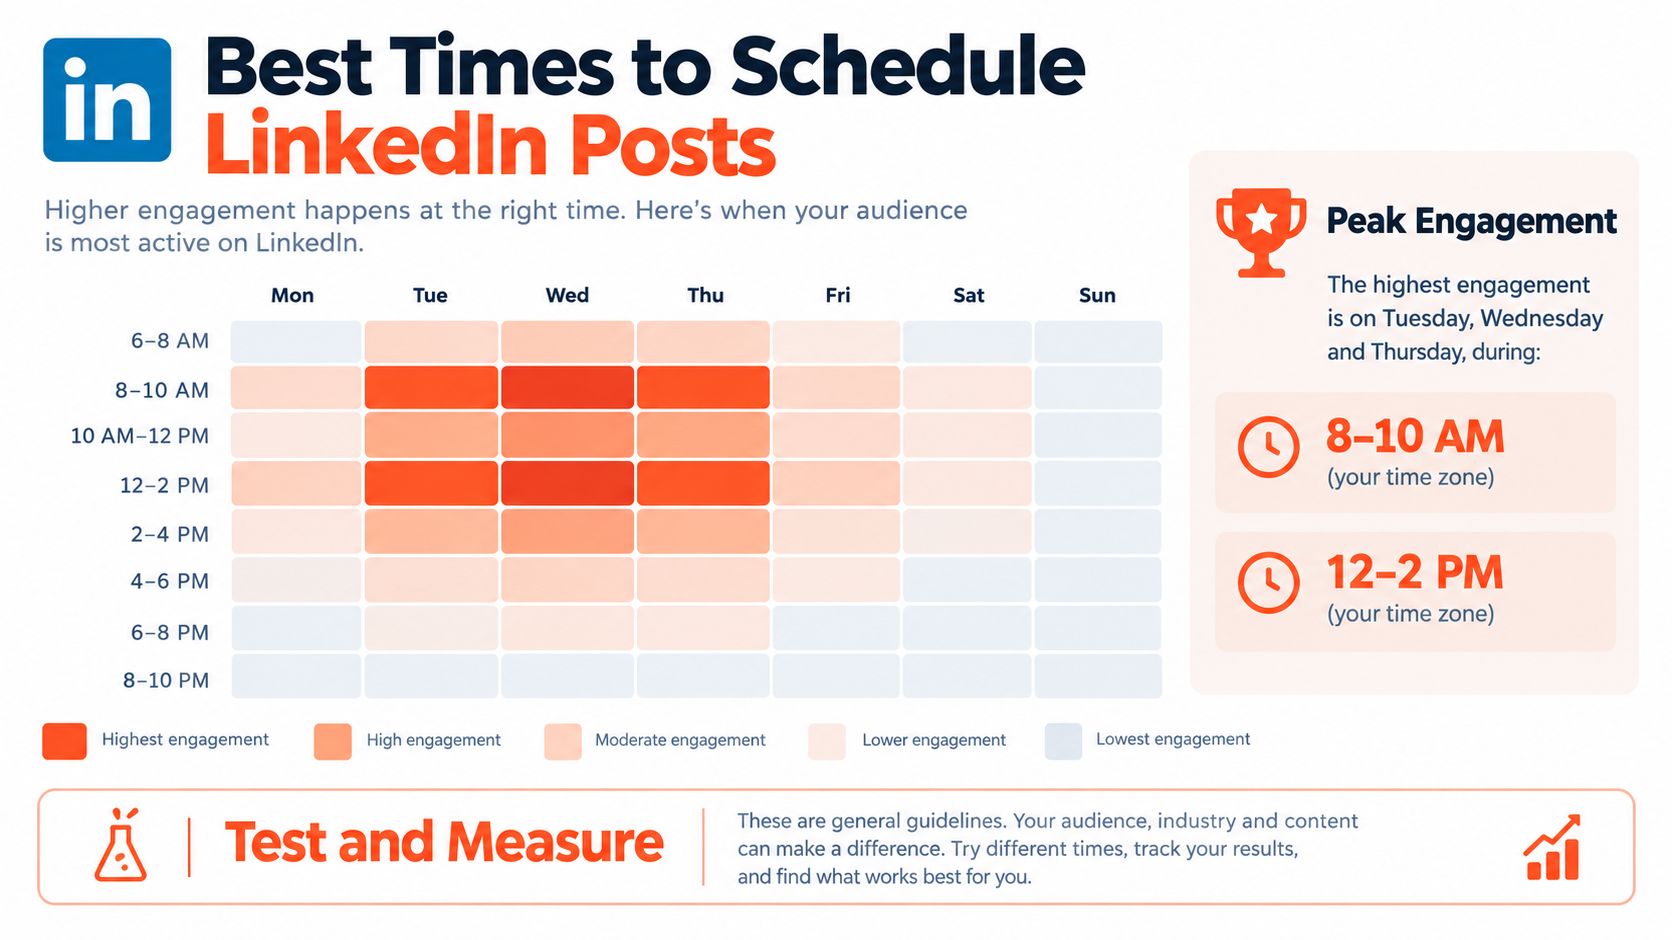
Timing works best as an operating system, not a one-time guess. Weekdays, particularly Tuesday through Thursday, tend to produce stronger engagement because professionals are checking LinkedIn during the workweek. A Buffer analysis of 4.8 million posts found the strongest overall window was 3 p.m. to 8 p.m. on weekdays, with Wednesday at 4 p.m. performing best in that analysis Buffer timing analysis.
Pick a starting window, then test it
Choose one repeatable publishing window and run it for at least two weeks before changing course. LinkedIn's own guidance recommends 3 to 5 posts per week on weekdays, particularly Tuesday through Thursday, and emphasizes the first hour after publication because early replies can support reach LinkedIn marketing guide.
Schedule according to the audience's local time. A London audience should receive a post during its workday even if the person managing the account works in Austin. For international accounts, record the target time zone beside each publishing slot, then check daylight-saving changes before loading a queue. Native scheduling may follow the account user's location, so confirm the displayed time before approving a post.
Use a simple test:
Schedule the same post format in two or three time slots.
Track comments, reactions, and profile visits.
Keep the slot that produces the strongest consistent response.
A slot that generates comments may be more useful than one that produces passive views, particularly when the post supports sales conversations or recruitment. Compare like with like, and avoid changing the topic, format, and timing in the same test.
For a more focused timing reference, best time to post on LinkedIn offers a practical way to compare timing approaches without treating one hour as universal.
The objective is a repeatable schedule that matches audience behavior, time zones, and the team's ability to respond soon after publication.
Building a Repeatable Scheduling and Crossposting Workflow
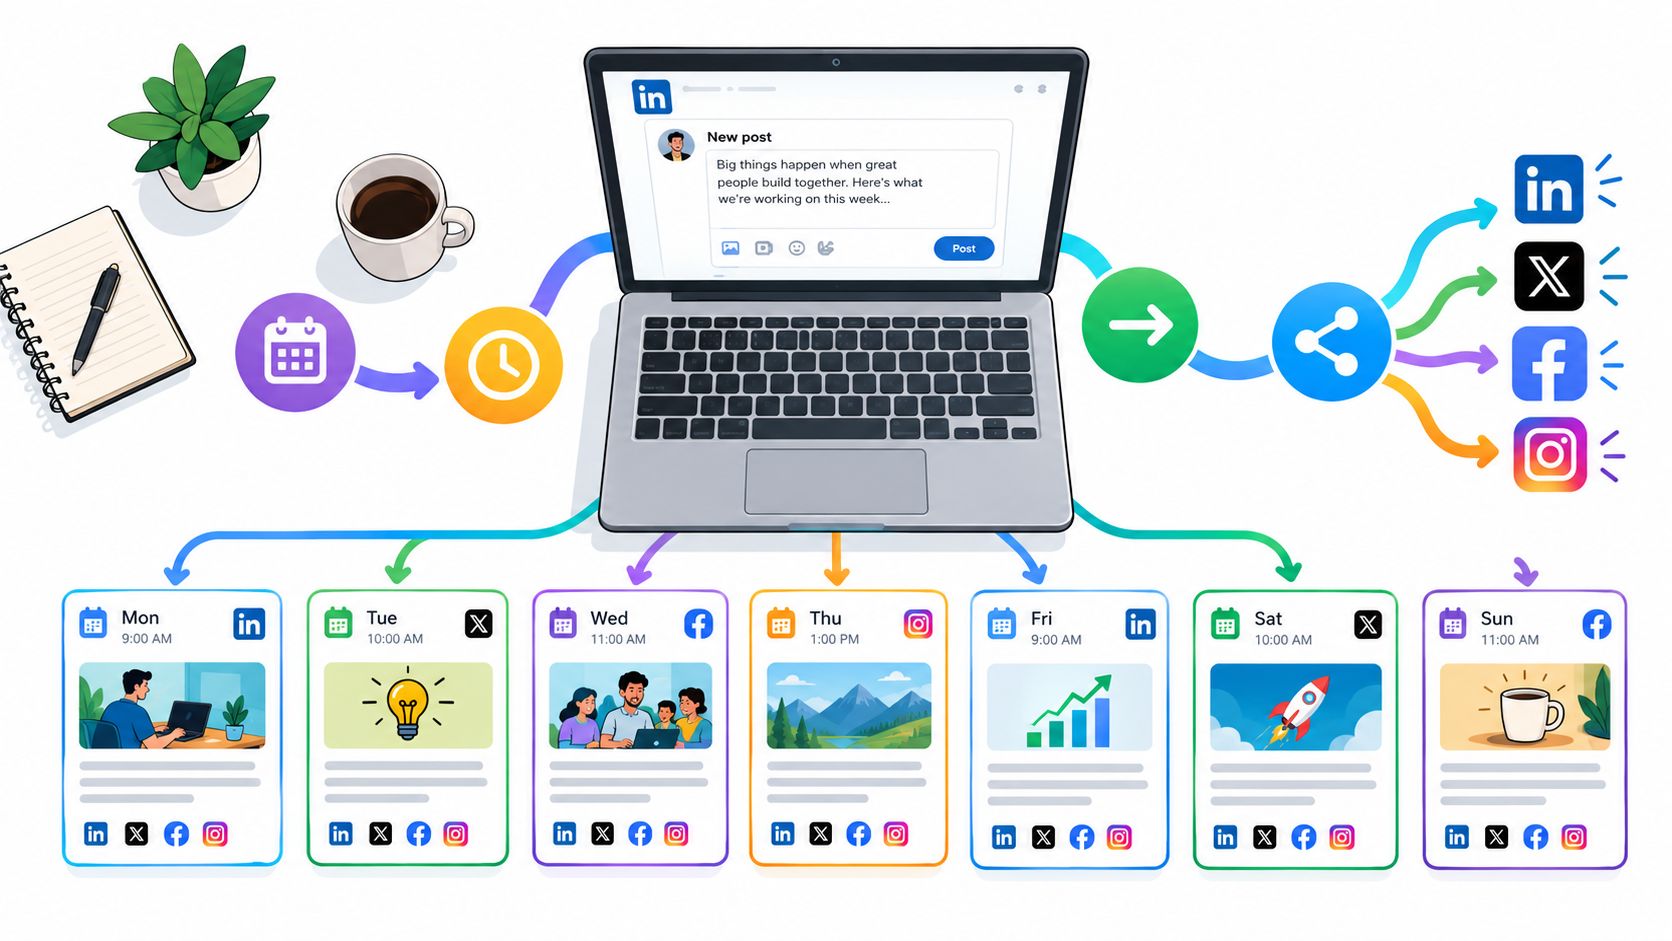
A repeatable LinkedIn workflow begins with one source asset and a clear publishing plan. Use a newsletter, podcast transcript, long article, or client case note as the starting point. Extract several distinct angles, then queue them in one working session instead of creating a new post every morning.
Visual consistency should be planned at the same time as copy. A tool to create images for social media can help teams prepare graphics before scheduling, so the design supports the caption rather than competing with it.
A practical cadence that holds up
The cadence covered earlier becomes easier to maintain when it is treated as an operations schedule. Five weekly slots require two drafting blocks, not five separate writing sessions. Batch three posts on Monday and two on Wednesday, then review the queue before each publishing window.
Adapt each idea for its destination. LinkedIn may need a stronger professional angle, while Instagram, TikTok, YouTube, and Facebook may need different openings, lengths, or media. WaveGen.ai's multi-platform publishing workflow can help turn one source into channel-specific drafts without rebuilding every post manually.
Scheduling also needs an ownership rule. Assign someone to monitor replies soon after publication, particularly for posts designed to start conversations. A queued post can publish on time and still underperform if nobody is available to answer relevant comments while interest is active.
The working sequence is simple: create the source, tailor each version, label the target time zone, schedule in batches, and monitor engagement after publishing. Record which formats create useful conversations, then adjust future slots without changing topic, format, and timing all at once. That process turns scheduling into a timing and operations system rather than a single button click.
Your Scheduling Checklist and Next Steps
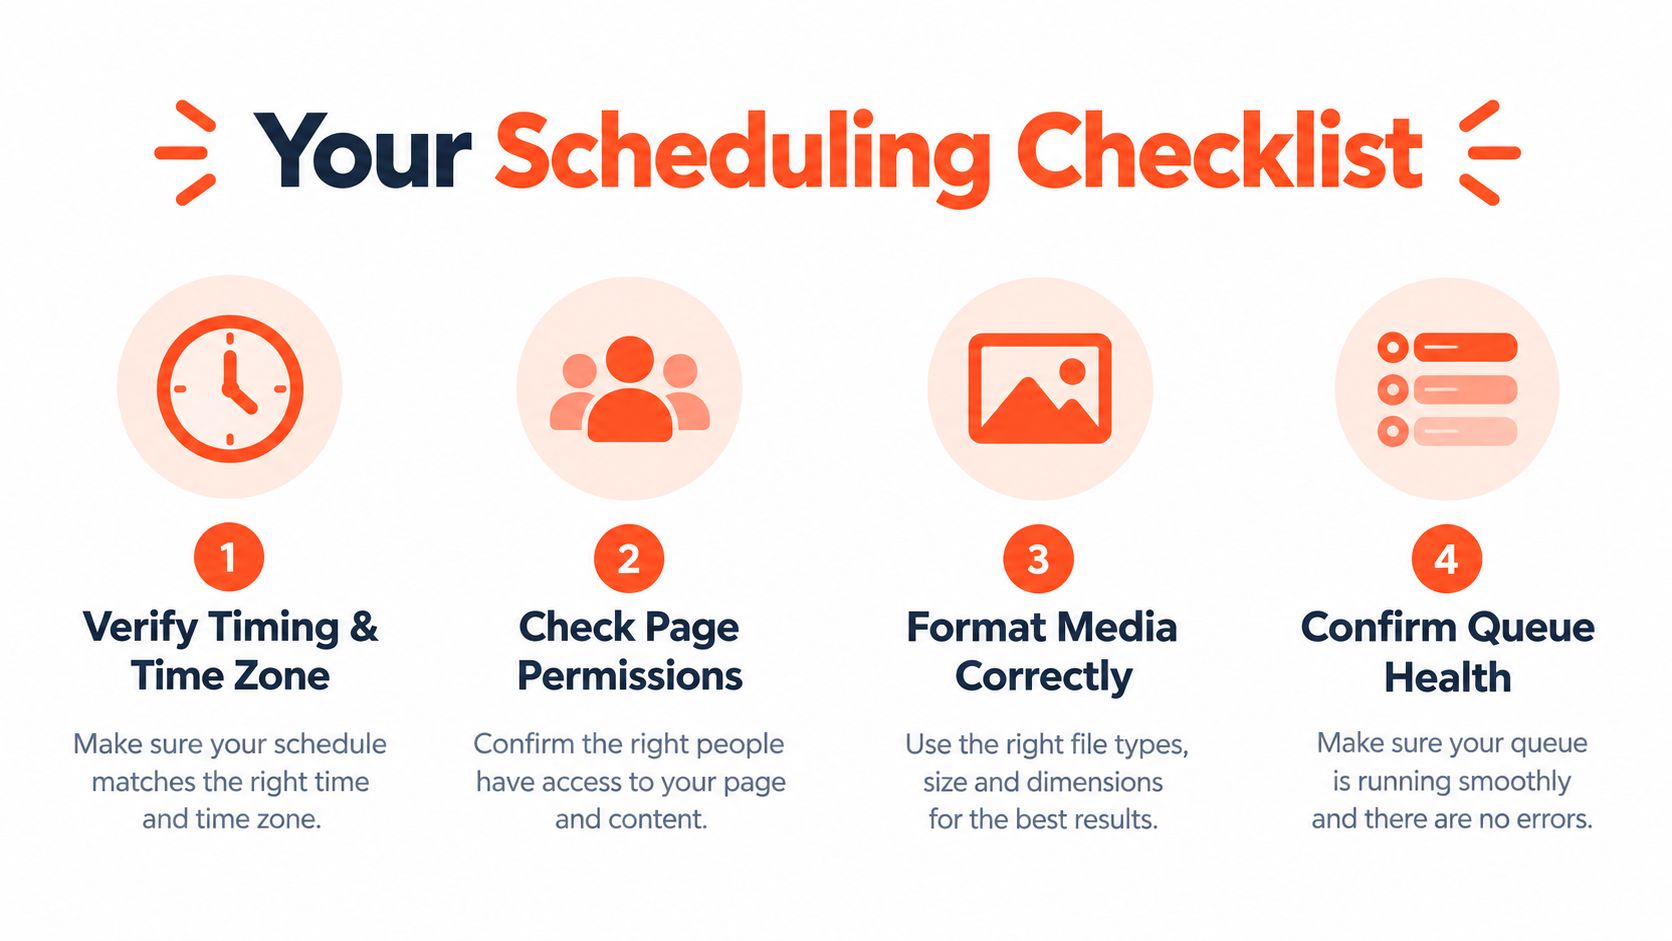
Before you confirm a scheduled post, run the same quick check every time. Verify timing and time zone, confirm Page permissions, format media correctly, and review queue health so nothing is sitting in the wrong slot. That short routine catches most of the mistakes that waste a good post.
If a post misses its window, don't treat it as a failure. Move it to the next sensible slot and keep going. If you're bouncing between mobile and desktop, make one device your default for scheduling so you don't lose track of where drafts live.
A strong finish looks like this:
- Timing: the post matches your audience's local workday.
- Access: you've got the right profile or Page permissions.
- Assets: images, captions, and links are ready before scheduling.
- Queue: the scheduled posts list is clean and intentional.
Consistency beats perfection here. If you can build one two-week calendar and test one timing window, you'll learn more than you would from randomly posting whenever you remember.
WaveGen.ai helps you turn one article, newsletter, podcast script, or transcript into scheduled social content for LinkedIn and other channels. If you want a system that handles repurposing, queueing, and crossposting without making you rebuild each post from scratch, visit WaveGen.ai and see how it fits your workflow.
how to schedule a linkedin post
linkedin scheduling
linkedin content calendar
linkedin best times
social media scheduling
Turn this kind of writing into a week of social content.
Paste a blog post, newsletter, or rough draft — WaveGen turns it into publish-ready carousels, captions, and slideshows for every channel.
No credit card · First posts in 2min